
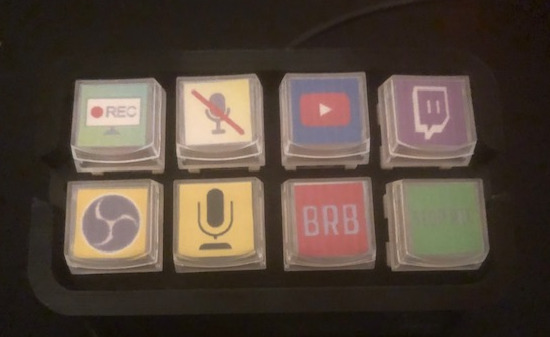
Let’s face it – using keyboard shortcuts tends to be a lot faster than drilling down through context menus, but memorizing the special key combinations can be a pain. Special-purpose key pads such as Stream Decks solve this problem, but come at a premium price. The good news is that it is easy to make your own custom macro keypad for under $20.
Materials
(1) Arduino Pro Micro ($6)
(8) Cherry MX Replacement Switches ($5)
(8) Clear Cherry MX Compatible/Relegendable Keycaps ($6)
(1) Micro USB Cable
(1) 3D-printed enclosure https://www.thingiverse.com/thing:2822140
Assembly is pretty straight-forward. Just solder one set of pins on the back of the key switches to a stripped common ground wire. Solder the others to the pins on the Arduino. You can also include some LEDs if you want a backlight feature.
There are a few ways you can approach the coding for this project. The simplest is to just consider the buttons as being numbered (from 2 to 9 in the code below), and sending Ctrl + Alt + character/number as the keyboard when the button is pressed. The upside to this approach is that it is simple to remember and you don’t need to update the firmware in the Arduino. The downside is that you need to set the hotkey macro in the app(s) that you want to control.
#include <Keyboard.h>

#define BUTTON_COUNT 8
#define LED_PIN      10


// Pins to use for each key button
int  button_pins[BUTTON_COUNT] = {14, 4, 3, 2,  16, 7, 6, 5};
// Character to send for each key button (preceded by Ctrl + Alt)
char button_char[BUTTON_COUNT] = {'2', '3', '4', '5', '6', '7', '8', '9' };

void setup()
{
  Keyboard.begin();
  Serial.begin(9600);
  Serial.println("Leonardo Micro Button Launch");

  for (int i = 0; i < BUTTON_COUNT; i++)
  {
    pinMode(button_pins[i], INPUT_PULLUP);
  }

  pinMode(LED_PIN, OUTPUT);
}


void loop()
{
  CheckAllButtons();
}


void CheckAllButtons(void) {

  for (int i = 0; i < BUTTON_COUNT; i++)
  {
    if (digitalRead(button_pins[i]) == LOW)
    {
      Serial.println(i);
      Keyboard.press(KEY_LEFT_CTRL);
      Keyboard.press(KEY_LEFT_ALT);
      Keyboard.press(button_char[i]);
      digitalWrite(LED_PIN, HIGH);
      delay(150);
      digitalWrite(LED_PIN, LOW);
      Keyboard.releaseAll();
    }
  }
}
The other option is to code the target app-specific keystrokes to send in the sketch. This is handy for apps that don’t have a nice hotkey mapping feature, or when you want to send longer and more complicated commands.
Comment (1) on "DIY Macro Keypad"
Comments are closed.