
Through-Hole Technology (THT) is great for getting comfortable with soldering, translating breadboard circuits to proto boards, and projects where space constraints are not an issue. However, at some point you’ll probably want to start working with Surface Mount Technology (SMT) and Surface Mount Devices (SMD).
There are several compelling reasons for wanting to do this:
- Pretty much all modern designs use SMT components.
- Most new ICs are only available in SMT packages.
- SMT designs take up less space.
- SMT components have reduced parasitic capacitance and inductance (i.e. roughly 1/2 of THT parts) due to shorter/non-existent leads.
- SMT components allow for easier 3rd party manufacturing.
The downsides to SMT:
- You need magnification and a steady hand.
- Identifying SMT passives can be a bit more challenging.
- Breadboarding SMT ICs requires either a breakout board with DuPont pin headers or some fussy soldering of solid-core wires to the pads.
- You’re going to have to up your flux game. This also makes post-assembly clean-up a bit more work.
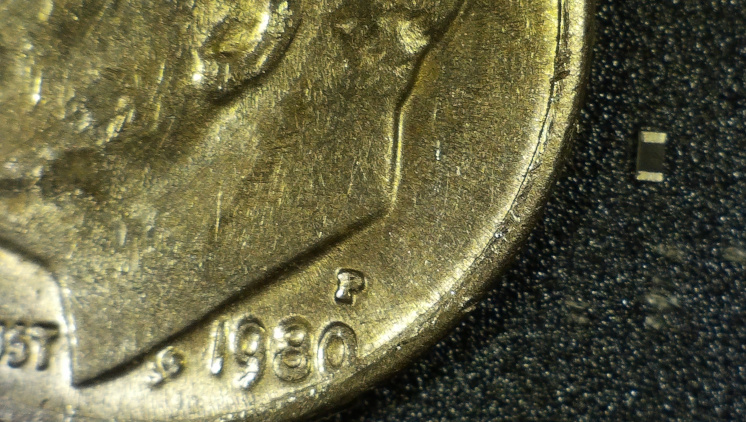
- One sneeze and you are NEVER going to find that 0402 resistor. (These are only about 1mm x 0.5 mm and don’t look much different from a speck of dirt once they fall on the floor.)
Recommended Tools and Hardware
The good news is that if you are already doing THT soldering, there’s not much in the way of additional tools or supplies that you’ll need. You probably have most of these on-hand already, and the others are not expensive.
Of course there are plenty of nifty and expensive tools that you CAN buy, but hold off on those until after you’ve got a couple successful SMT builds under your belt.
- Temperature-controlled soldering iron. You can get away with a non-controlled iron for THT, but for SMT you really want to be able to dial-in and maintain the temperature. My X-Tronic 3020 has provided solid performance at an attractive price point. If you got your current iron in a $15 kit from AliExpress, you’ll probably want to upgrade.
- Small chisel tip. I like the 0.8 D shape profile, which has two flat-ish sides like a screwdriver. It’s handy because it can act like a wider or narrower tip depending on how you orient it to the component.
- 0.6mm rosin core solder. I prefer a Sn63/Pb37 composition. The working properties of lead-free are OK for THT, but much more difficult for SMT hand soldering.
- Flux. I find that an alcohol-based flux pen for rework gives good results.
- Hands-free magnification and illumination. A 2-4x magnifier with built-in LEDs, with or without helping hands/articulated alligator clips. The helping hands are more useful for THT work and tend to just get in the way for SMT work.
- Tweezers. Get anti-static, anti-magnetic, stainless steel for precision work in a few different tip profiles. The cheap eyebrow tweezers from the local pharmacy do not work well.
- Isopropyl alcohol. For cleaning the boards afterwards. A small brush (i.e. an old toothbrush that you’ve sent through the dishwasher) and lint-free rag will also be helpful.

Getting Started
There are several different surface mount practice kits available. These are a good first step and provide the several advantages:
- They’re usually inexpensive. I don’t suggest your first surface soldering attempt be on a $10 STM32F7 with 176 pins. Gikfun has a soldering skill kit that costs around $8 and will provide far more practice. As a bonus, it provides a handy size chart on the back.
- They provide a number of different SMT parts. This lets you get a feel for the sizing and determine how small you’re willing and able to go.
- Ordering a kit is way quicker and easier than ordering all the parts that you’d need for even a fairly simple project.

After you’ve ordered your hardware, supplies, and kit, it’s worthwhile to get familiar with the various SMT component sizes, package names, and characteristics. Smaller parts are obviously more challenging, as are ICs with very fine pin pitches. Some package types are not conducive to hand soldering and should be avoided.
There are a whole slew of package acronyms to contend with, but anything that ends in “GA” is not hand-solderable. These are Grid Array packages that require specialized soldering and verification equipment. Naturally, some masochists have actually hand-soldered these chips. Check out this picture, and then you can decide if you want to try it yourself:
https://img.mysku-st.ru/uploads/images/00/02/75/2015/09/14/92425f.jpg
The Tack Weld
The first step of getting pad or pin on an SMT component soldered while keeping the part in perfect alignment is the most critical – and often the most frustrating. Unless you’re an experienced surgeon, chances are you’ll need to practice just holding and manipulating the part with the tweezers. It’s also helpful to be able to do this with either hand.
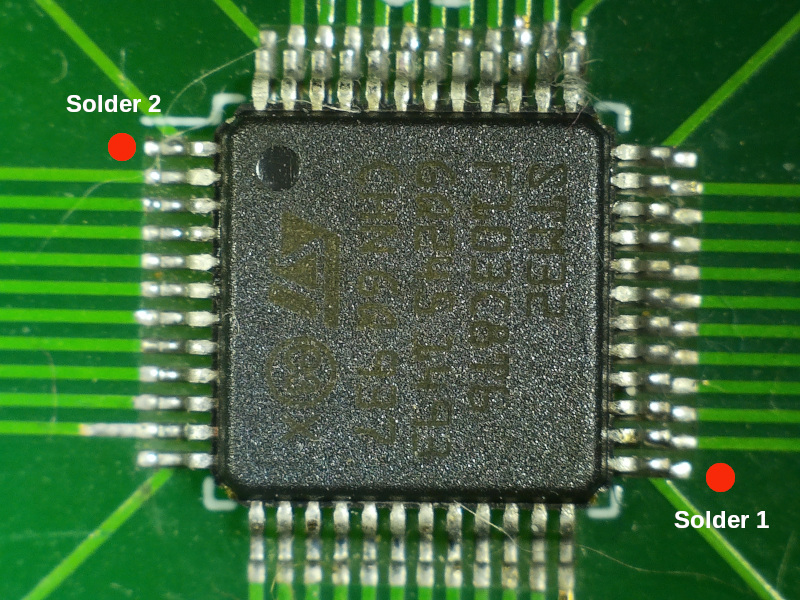
There are 2 main ways to do the initial solder connection. The first is to put a small amount of solder on 1 of the pads, align the part, and then heat the pad to melt the solder. Double-check the alignment and reheat/adjust as necessary. This approach works especially well for ICs. For higher pin-count ICs, you should then also tack solder the pin diagonal from the initial solder point to keep the part in place while you solder the other pins.
The second method involves getting a little solder on the tip, aligning the part, and then applying the tip to the pad/pin juncture. Don’t try to use a lot of solder – just enough to hold the part in place. Then solder the other pins/pads as you would normally. Finally, come back to the first pad and add a bit more solder. This works well for parts with low pin/pad counts (i.e. resistors, capacitors, diodes, transistors, etc.)
The remaining pins on ICs with larger pins and pitches can be soldered as normal, but packages such as the LQFP that you commonly encounter with microprocessors require a slightly different approach. For these, start by applying a liberal amount of flux to the pins on one side of the IC. Put a small amount of solder on the side of the tip, and then run it along the pad/pin junction perpendicularly to the pins. The “comb out” any cross-bridges by moving the iron along the tips towards the pads.
Keys for this to work:
- Keep the iron at the right temperature. I find 660 – 680F works well with my setup.
- Don’t put too much solder on the tip. It’s easier to do a second pass with more solder than to try to get rid of a big blob of solder stuck to multiple pins.
- Don’t be afraid to add a bit more flux for second (or third passes).
- Use the side of the tip for drawing the solder. Hold the pen almost parallel to the PCB.
- Make sure that the iron makes contact with both the pins AND the pads when drawing the solder. Remember, solder flows towards heat – so both the pins and the pads should receive heat from the iron.
- Don’t be stingy with the flux. This is what helps the solder to flow and not form those annoying cross-bridges.
- Don’t let the iron sit in one place too long.
When the part or section of parts is done, double check your work closely. Inspect it from different angles with good lighting – shadows can hide problems. If in doubt, do a continuity check.
Finally, when you’re done, use some isopropyl alcohol and a toothbrush to clean up the PCB and wipe gently with a lint-free cloth. Then cross your fingers and proceed with powering it up.
Tips and Tricks
- SMT components come in tape-like rolls. One side normally has a plastic or cellophane window. Use tweezers with a fairly sharp point for opening the plastic, then dump the part onto a small tray or ant-static mat.
- Work on 1 part at a time. Don’t have a bunch of loose parts on your bench at once.
- Label, segregate, and organize your SMT parts. They can be very hard to identify without a label.
- Be patient! Sometimes it seems like those little pieces have a mind of their own and refuse to stay where you want them to. Don’t get frustrated! Just take a deep breath (but don’t exhale on any loose parts or you’ll probably never see them again) and relax. More force will not solve the problem. Take a break, and then try again.
Once you’re feeling comfortable with the basic process, then it’s time to move on to more exciting and challenging SMT projects. We’ll be discussing some ideas and approaches for those in upcoming posts.